


You need to have a serverless account setup on your machine and for that please see the previous article.
Creating S3 bucket
Open the servell.yml file and the following lines to it to create an s3 bucket.
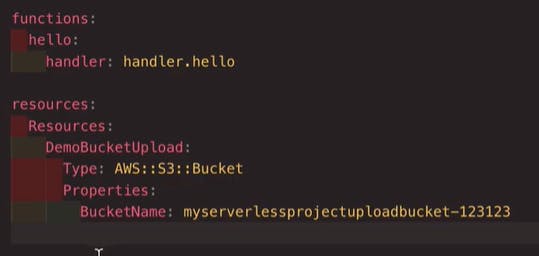
Bucket name should be unique so that its more likely to be created without giving any errors at runtime.
Then Open the Terminal window and again type
- sls deploy
Now go back to your AWS account and search for S3 on the console Inside the S3 dashboard, you will see a freshly created bucket with the name as you specified
Uploading data to S3 bucket
open your terminal and install the package
- npm install --save serverless-s3-sync
Now open the serverless.yml file and write the following lines of code to it
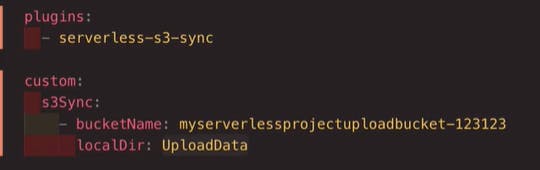
This adds the plugin s3sync that basically synchronizes the data. Note two thing here
- bucketName should be the same as your bucket name which we have created earlier
- localdir - write the directory name of which the contents you want to upload in S3 bucket
now again open the terminal window and type
- sls deploy

To check the working of this go back to your AWS account then get inside your S3 bucket you will find that all the files which were in your local directory are now inside the S3 bucket.
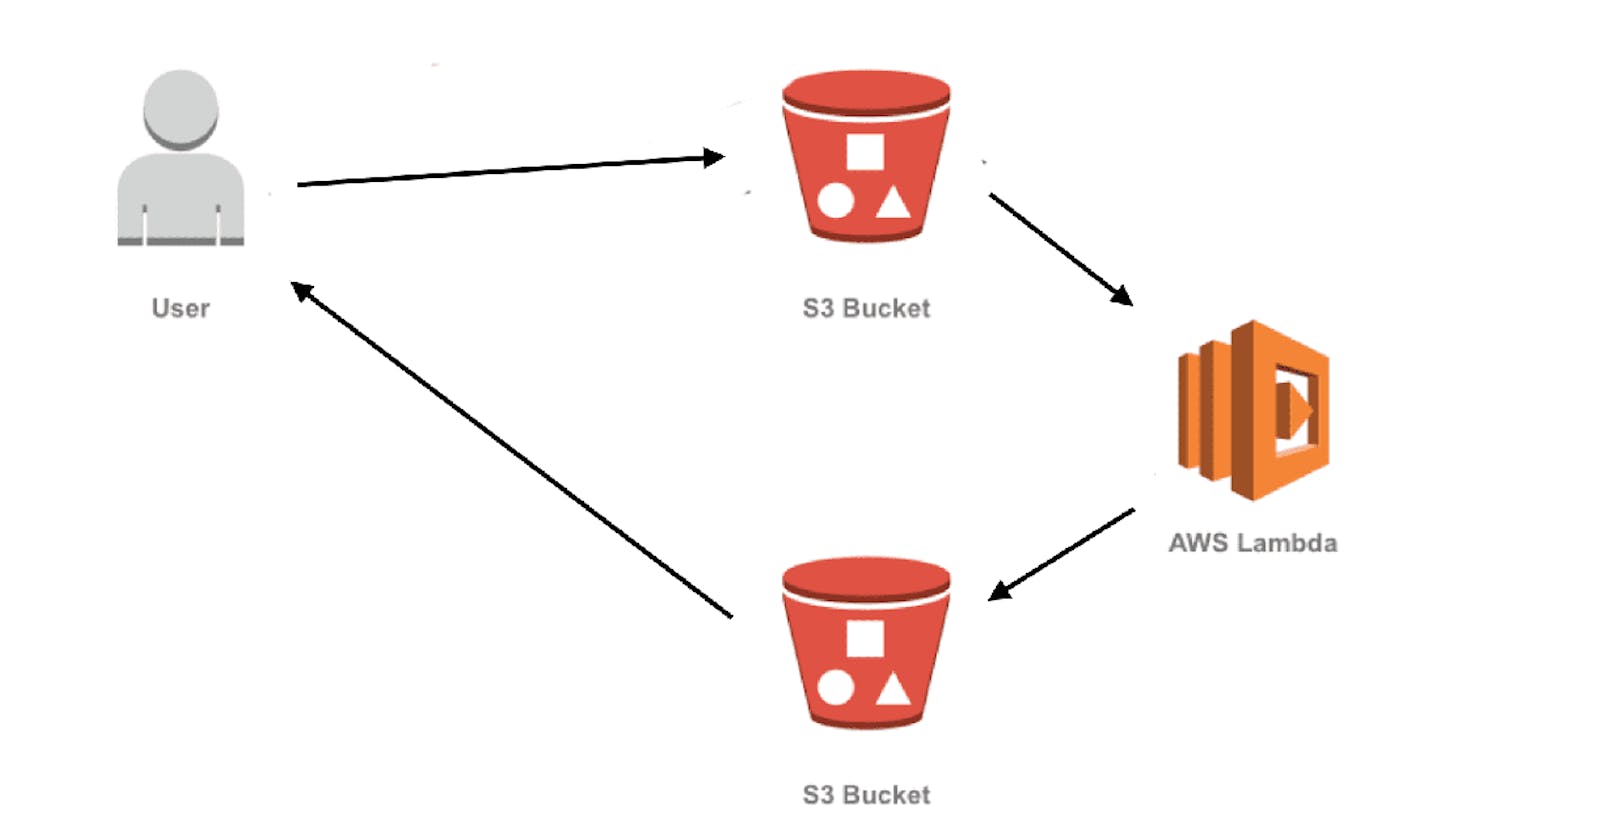
You can use these steps to work on two different projects:
- Create as many buckets as the user needs within a single click.
- Add multiple files into your bucket.